GUI System
Taichi has a built-in GUI system for visualizing simulation data in data containers like Taichi fields or NumPy ndarrays. It also has limited support for drawing primitive geometries.
Create and display a window
The following code creates a 640x360 window with a "Hello World!" title, and displays it by calling gui.show():
gui = ti.GUI('Hello World!', (640, 360))
while gui.running:
    gui.show()
note
Call gui.show() inside a while loop. Otherwise, the window would flash once and disappear.
Close the window
You can set gui.running=False in the while loop to close the GUI:
gui = ti.GUI('Window Title', (640, 360))
while gui.running:
    if some_events_happend:
        gui.running = False
    gui.show()
Coordinate system
Each window is built on a coordinate system: the origin is located in the lower-left corner, with the +x direction stretching to the right and the +y direction stretching upward.
Display a field or ndarray
To display a Taichi field or a NumPy ndarray, call gui.set_image(). The method accepts both types as input.
image = ti.Vector.field(3, ti.f32, shape=(640, 480))
while gui.running:
    gui.set_image(image)
    gui.show()
Because Taichi field is a global data container, if the vector field image is updated between the while loops, the GUI window refreshes to display the latest image.
IMPORTANT
Ensure that the shape of the input matches the resolution of the GUI window.
Zero-copying frame buffer
In each loop of the gui.set_image() method call, the GUI system converts the image data to a displayable format and copies the result to the window buffer. This causes huge overload when the window size is large, making it hard to achieve high FPS (frames per second).
If you only need to call the set_image() method without using any drawing command, you can enable fast_gui mode for better performance. This mode allows Taichi GUI to write the image data directly to the frame buffer without additional copying, and significantly increases FPS.
gui = ti.GUI(res, title, fast_gui=True)
For this mode to work, ensure that the data passed into gui.set_image() is in a display-compatible format. In other words, If it is a Taichi field, ensure that it is one of the following:
- a vector field
ti.field(3, dtype, shape)compatible with RGB format. - a vector field
ti.field(4, dtype, shape)compatible with RGBA format.
Note that dtype must be ti.f32, ti.f64, or ti.u8.
Draw on a window
Taichi's GUI system supports drawing simple geometries, such as lines, triangles, rectangles, circles, and texts.
The pos parameter of every drawing method accepts Taichi fields or NumPy arrays, not Python primitive lists. Each element of the array is a pair of floats ranging from 0.0 to 1.0, which represent the relative positions of the geometries. For example:
(0.0, 0.0): the lower-left corner of the window.(1.0, 1.0): the upper-right corner of the window.
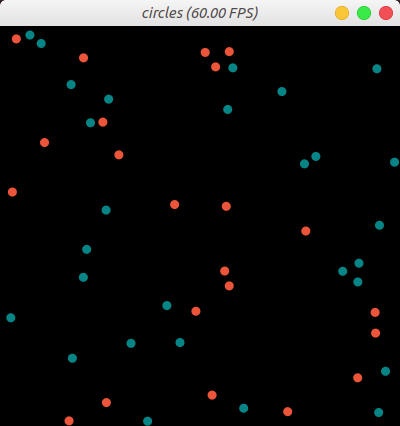
The following code draws 50 circles with a radius of 5 and in three different colors randomly assigned by indices, an integer array of the same size as pos.
import numpy as np
pos = np.random.random((50, 2))
# Create an array of 50 integer elements whose values are randomly 0, 1, 2
# 0 corresponds to 0x068587
# 1 corresponds to 0xED553B
# 2 corresponds to 0xEEEEF0
indices = np.random.randint(0, 2, size=(50,))
gui = ti.GUI("circles", res=(400, 400))
while gui.running:
    gui.circles(pos, radius=5, palette=[0x068587, 0xED553B, 0xEEEEF0], palette_indices=indices)
    gui.show()

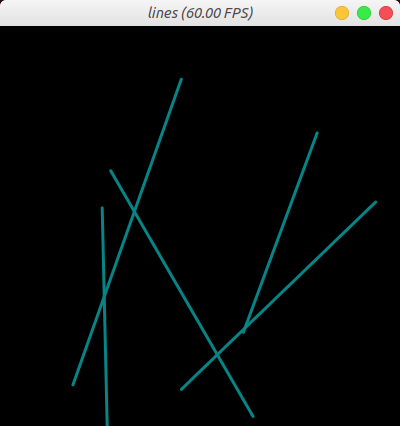
The following code draws five blue line segments whose width is 2, with X and Y representing the five starting points and the five ending points.
import numpy as np
X = np.random.random((5, 2))
Y = np.random.random((5, 2))
gui = ti.GUI("lines", res=(400, 400))
while gui.running:
    gui.lines(begin=X, end=Y, radius=2, color=0x068587)
    gui.show()

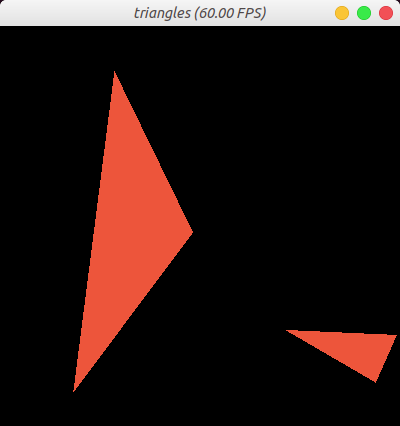
The following code draws two orange triangles orange, with X, Y, and Z representing the three points of the triangles.
import numpy as np
X = np.random.random((2, 2))
Y = np.random.random((2, 2))
Z = np.random.random((2, 2))
gui = ti.GUI("triangles", res=(400, 400))
while gui.running:
    gui.triangles(a=X, b=Y, c=Z, color=0xED553B)
    gui.show()

Event handling
Taichi's GUI system also provides a set of methods for mouse and keyboard control. Input events are classified into three types:
ti.GUI.RELEASE  # key up or mouse button up
ti.GUI.PRESS    # key down or mouse button down
ti.GUI.MOTION   # mouse motion or mouse wheel
Event key is the key that you press from your keyboard or mouse. It can be one of:
# for ti.GUI.PRESS and ti.GUI.RELEASE event:
ti.GUI.ESCAPE  # Esc
ti.GUI.SHIFT   # Shift
ti.GUI.LEFT    # Left Arrow
'a'            # we use lowercase for alphabet
'b'
...
ti.GUI.LMB     # Left Mouse Button
ti.GUI.RMB     # Right Mouse Button

# for ti.GUI.MOTION event:
ti.GUI.MOVE    # Mouse Moved
ti.GUI.WHEEL   # Mouse Wheel Scrolling
An event filter is a combined list of key, type, and (type, key) tuple. For example:
# if ESC pressed or released:
gui.get_event(ti.GUI.ESCAPE)

# if any key is pressed:
gui.get_event(ti.GUI.PRESS)

# if ESC is pressed or SPACE is released:
gui.get_event((ti.GUI.PRESS, ti.GUI.ESCAPE), (ti.GUI.RELEASE, ti.GUI.SPACE))
gui.get_event() pops an event from the queue and saves it to gui.event. For example:
if gui.get_event():
    print('Got event, key =', gui.event.key)
The following code defines that the while loop goes on until ESC is pressed:
gui = ti.GUI('Title', (640, 480))
while not gui.get_event(ti.GUI.ESCAPE):
    gui.set_image(img)
    gui.show()
gui.is_pressed() detects the pressed keys. As the following code snippet shows, you must use it together with gui.get_event(). Otherwise, it is not updated. For example:
while True:
    gui.get_event()  # must be called before is_pressed
    if gui.is_pressed('a', ti.GUI.LEFT):
        print('Go left!')
    elif gui.is_pressed('d', ti.GUI.RIGHT):
        print('Go right!')
caution
Call gui.get_event() before calling gui.is_pressed(). Otherwise, gui.is_pressed() does not take effect.
For example:
while True:
    gui.get_event() # must be called before is_pressed
    if gui.is_pressed('a', ti.GUI.LEFT):
        print('Go left!')
    elif gui.is_pressed('d', ti.GUI.RIGHT):
        print('Go right!')
Retrieve cursor position
gui.get_cursor_pos() returns the cursor's current position in the window. The return value is a pair of floats in the range [0.0, 1.0]. For example:
mouse_x, mouse_y = gui.get_cursor_pos()
GUI Widgets
Taichi's GUI system also provides widgets, including slider(), label(), and button(), for you to customize your control interface. Take a look at the following code snippet:
import taichi as ti
gui = ti.GUI('GUI widgets')

radius = gui.slider('Radius', 1, 50, step=1)
xcoor = gui.label('X-coordinate')
okay = gui.button('OK')

xcoor.value = 0.5
radius.value = 10

while gui.running:
    for e in gui.get_events(gui.PRESS):
        if e.key == gui.ESCAPE:
            gui.running = False
        elif e.key == 'a':
            xcoor.value -= 0.05
        elif e.key == 'd':
            xcoor.value += 0.05
        elif e.key == 's':
            radius.value -= 1
        elif e.key == 'w':
            radius.value += 1
        elif e.key == okay:
            print('OK clicked')

    gui.circle((xcoor.value, 0.5), radius=radius.value)
    gui.show()